Many years ago, I repurposed an ageing Dell tower PC into a household server named “Attic.” After the fire, we had to move out of the house for a while, and it no longer made sense to keep it. So I kept the hard drives, and junked the aging PC hardware. The original machine ran Linux (Debian), simply because I find it a slightly more useful way to configure as a remotely accessed device than a Mac or PC. But to quote @jwz: “Linux is free only if your time is worth nothing“. Nearly two decades later, that’s still true.
I still missed having the server though. I found another leftover computer, this time a 2011 Mac Mini my son used in middle school, and set it up again as a household sever.
The installation is the easy part, everything else is messy. It’s Linux: meaning it’s nobody’s job to make sure everything works. Or rather, it’s everybody’s job to make sure anything works. The good news is all the nerds use Linux and post about it, so help is usually just a few searches away. Click “read more” for a running brain dump of what I’ve discovered so far while getting it on the air.
Initial installation
Setup is way easier now:
- Download the Ubuntu distro to thumb drive. I used rufus to create a bootable version of Ubuntu Server 20.04 ISO image.
- Plug the Mac Mini’s HDMI output into a screen, and plug in a USB keyboard.
- Boot the Mac mini with the option key down and let it boot off the thumb drive.
- Let it take over the disk and install.
- Log in, and create additional accounts for everybody using it with sudo adduser username.
After this, it’s possible to log into the server using the hostname you chose during installation over the network via ssh on another Unix machine or a shell window on a Mac. On a PC, install putty to access it.
Note this approach overwrites all contents on the Mac. So if you had anything you wanted on that computer, save it first!
The Wifi
I had an idea it might be nice to get the Mac Mini’s wifi to work. The default Ubuntu install doesn’t support it. I downloaded the driver:
$ sudo apt update
$ sudo apt install firmware-b43-installer
$ sudo reboot now
Then, to see what’s going on, I added:
$ sudo apt install network-manager      # Get the nmcli command
$ ls /sys/class/net                     # Shows the installed net devices
$ sudo nmcli dev wifi connect SSID password 'YourPassword'
The last command, where SSID is your Wifi name, gets you on the air. This doesn’t happen automatically though, so I put this command in /etc/init.d/wifi_login and used
$ sudo chown a+x /etc/init.d/wifi_login
$ sudo ln -s /etc/init.d/wifi_login /etc/rc3.d/S05wifi_login
To make it part of the boot process. This seemed to work. On the air with Wifi. Great!
…until I installed something else. Was it Apache? Was it Samba? Who knows, but something I did down the line killed the wifi. I installed (sudo apt install) wpasupplicant, and wireless-tools.
If the Wifi is dead, I found
$ sudo wpa_cli
> reassociate
Works to revive it, but you must wait about 10-15 seconds before exiting wpa_cli for it to take effect.
I fiddled (for hours) with the Wifi, thinking it would make placing Attic much more flexible. I found I could not make it consistently come up without the reassociate procedure above. However, the Mac Mini is small enough, quiet enough, and attractive enough that placing it near an Ethernet cable isn’t much of a burden.
Disks
WARNING: The following procedures can immediately destroy the contents of entire disk drives. Use at your own risk!
After installing Linux, I was annoyed to discover df reporting less than half of the drive’s rated capacity. Googling around, I found something new since I last did any serious Linux configuration is “Volume Groups” and “Logical Volumes”. It turns out, the default install created a “logical volume” with half the space of the disk drive. To find out what’s actually plugged into your computer, use:
$ sudo lsblk -e7 -f -m -pThis displays the sizes of the physical devices and their associated partitions. To get the space back, use:
$ sudo vgdisplay      # Reports "volume groups", displays Alloc vs. free space
$ sudo lvdisplay      # Reports "logical volume (LV Path)

$ sudo lvextend -l +100%FREE <LV Path>
$ sudo resize2fs <LV path>
In the last two commands, <LV path> is the LV Path reported by lvdisplay. In my case it was /dev/ubuntu-vg/ubuntu-lv, YMMV. Some background.
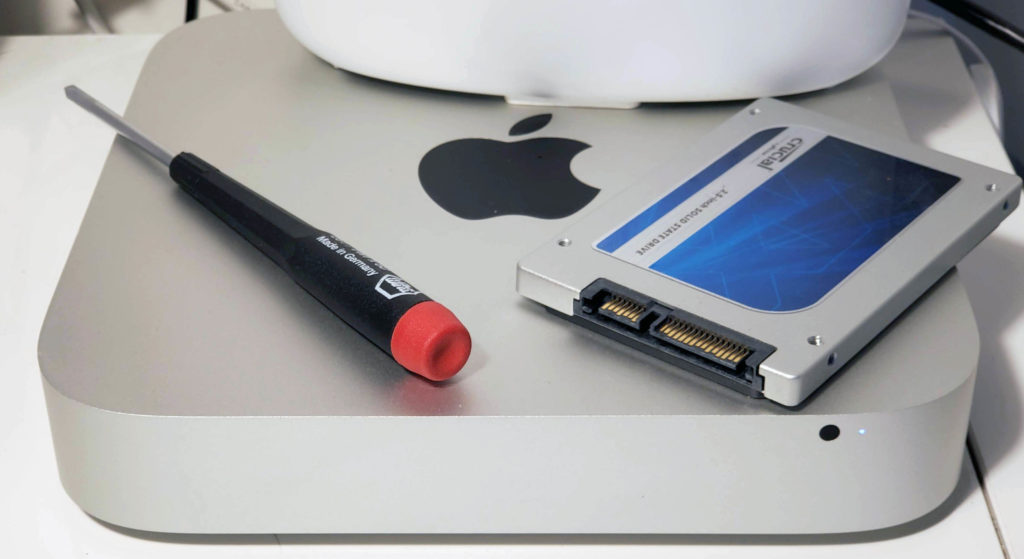
Upgrading the disk
Even with the space recovered, 500GB wasn’t going to be enough space, so I upgraded the SSD in the Mac Mini to 2TB. The first step is copying the original drive to the new (larger) one. I used a USB adapter to plug the new drive in externally. The boot drive device is usually /dev/sda and if you plug the new drive into a USB adapter, it’ll be something like /dev/sdb. Use lsblk as above to verify which is which. To duplicate the drive:
$ sudo dd if=/dev/sda of=/dev/sdb status=progressBE EXTREMELY CAREFUL WITH THIS COMMAND. It is a low-level, block by block copy, and if you get the “input file” (if) and/or “output file” (of) mixed up, you will immediately obliterate the wrong disk. Copying 500GB with a USB adapter on the Mini is slow. Like, 7MB/sec. If you do the math, that’s 20 hours.
After you copy the disk, the partition table on the new drive still thinks it’s the original size (remember, block by block duplicate). Here’s how to use the parted disk partitioning utility to expand partition #3 to use the rest of the space. Note we’re changing /dev/sdb, be sure to use the drive ID appropriate for your setup. Like everything else in this section, go slow and read up. Utilities like parted can do lots of damage in single command.
$ sudo parted /dev/sdb                # user input in bold
GNU Parted 3.3
Using /dev/sdb
Welcome to GNU Parted! Type 'help' to view a list of commands.

(parted) print                        # Display the current partitions
Model: ATA CT2000BX500SSD1 (scsi)
Disk /dev/sdb: 2000GB
Sector size (logical/physical): 512B/512B
Partition Table: gpt
Disk Flags:

Number  Start   End     Size    File system  Name  Flags
 1      1049kB  538MB   537MB   fat32              boot, esp
 2      538MB   1612MB  1074MB  ext4
 3      1612MB  500GB   499GB
        500GB   2000GB  1.4TB   Free Space

(parted) resizepart 3 100%            # Expand partition 3 to use all the free space
iFixit provides nice directions on how to swap the new drive into the Mac Mini. After swapping the new 2TB drive into the Mac Mini, it booted up just fine. However, df still reported only 500G of space. Well, remember the virtual/logical volume stuff? Yeah, that was still set for the old 500GB drive as well. Here’s the incantation to fix it, assuming the root partition is on /dev/sda3: (Note the new drive is /dev/sda now that it’s mounted internally).
$ sudo pvresize /dev/sda3
$ sudo lvextend -r -l +100%FREE /dev/mapper/ubuntu-vg/ubuntu-lv
That last parameter to lvextend is the logical volume reported by lvdisplay. YMMV. In the process of upgrading the disk drive, I discovered, iFixit sells a kit allowing a second drive to be mounted in the case. So the 500GB drive may yet come back inside the Mac Mini. Update Nov-2021: I acquired the 2nd drive kit, and tedious installation aside, it works.
Restoring the old Attic drives
I’d saved the old spinning 3.5″ hard drives from Attic. With an inexpensive external case, it’s easy to hook them up to a USB port. However, to actually see the contents, you need to:
$ sudo mkdir /media/hd            # Create a directory to mount the drive on
$ sudo lsblk -e7 -f -m -p         # To see the filesystems
$ sudo mount /dev/sdb1 /media/hd  # Mount the drive (look at the previous output to see the /dev/XXX to use)
Now you can copy the contents from the old drive partition on /media/hd to the internal drive. Remember some things (particularly in home directories) may be hiding in invisible files or folders beginning with a “.”. Files copied from another Unix system may have owners and groups that don’t match the new one, so you’ll need to fix it with commands like this:
$ sudo chown -R user:group /dir/to/change    # Fix ownership
$ sudo chmod -R u=rwx,go=r /dir/to/change    # Fix permissions
File Sharing with Samba
Samba works well for sharing files; both PCs and Macs know how to talk to it. Useful setup tutorials: one, two. The basic gist is to install it:
$ sudo apt update
$ sudo apt install samba
$ sudo ufw allow samba    # Update firewall rules to allow Samba traffic
To configure it, edit /etc/samba/smb.conf (you’ll need to do this as root). Below are the relevant sections I used; there are helpful comments in the default file, and lots of documentation and reference online.
# This sets up access to a "share" folder in everybody's home directory
# that'll appear when they access the server.
[homes]
   comment = Home Directories
   browseable = no
   path = /home/%u/share

# This disables guest access
[global]
  security = user
  encrypt passwords = true
  map to guest = bad user
  guest account = nobody

# This allows access to a global sharing folder on /share
[share]
   comment = Main share folder
   valid users = @share
   path = /share
   read only = no
   browsable = yes
   create mask = 0775
   directory mask = 0775
Use sudo smbpasswd -a username to add users to Samba. It does not automatically allow access from the existing system logins – you need to do this extra step. You also still need to create the ~user/share folders and /share, and set the permissions on them; the /etc/samba/smb.conf entries just makes them accessible. After changing the configuration files, you’ll need to
$ sudo service smbd restartTo get any configuration changes to take affect.
Once Samba is up and running, use \\attic to access it on a PC. On the Mac, use “Go > Connect to server…” in the Finder, and enter smb://attic (where “attic” is the hostname you configured).
Update 29-Aug-2022
I tried to do-release-upgrade to update Attic to Ubuntu 22.04.
COMPLETE FIASCO
Apparently it got confused about the boot volume, likely related to the issue of both drives (new large one & old small one) having the exact same ID’s, because of using dd to do a bit-by-bit copy of the old to the new drive.
The symptom was the boot would fail with various file system errors. It could be booted manually by attaching a keyboard & screen, and selecting “recovery” mode from the console, but the ultimate result was /boot on one drive, and the rest of Linux on another, with a kernel/release mismatch. Ick.
In retrospect, it would have been wise to completely reformat the old drive as soon as I installed it, possibly avoiding this particular mess.
Anyhow…
It was time to re-install Linux from scratch. I don’t have the expertise or patience to attempt the component-level repair of a broken Linux system. This time, I adopted the philosophy of putting only the OS/boot on the smaller drive, and all of my actual data on the larger drive. That way, if the OS needs to get nuked again, most my files are outside of the blast radius.
The first step was do a fresh re-install of` Ubuntu 22.04 onto the smaller drive. You must be very careful when doing the install to make sure you don’t blow away the larger drive.
The 22.04 installer also has an option to not create a logical volume, leaving you with an old-fashioned flat partition. This is much easier to deal with than all of the logical volume stuff I’ve described above. I wish I had this when I installed the original system, doing so simplifies the procedures above considerably. Unfortunately, there’s no way to “flatten” an LV drive back to a regular filesystem without reformatting it first.
Q & A
So old! So slow! Not really. Relative to what you’d get out of, say, a Raspberry Pi, the speed (2.5Ghz x2 cores, 4G RAM) and bandwidth is plenty for this server. The Apple hardware, even ten years old, is still nice and solid (and quiet and sleek). This is also very cheap; other than $180 for the new 2TB SSD, everything else is recycled.
Why not leave it as a Mac? The overhead for Mac OS is considerably more than Linux, and the Mac is not as convenient to manage in a “headless” configuration. Once the initial setup is done, everything is done remotely.
You know you can buy off the shelf solutions for this, right? Yes, but understanding Linux (and Unix in general) is a useful skill to have. I first learned the Unix shell commands over four decades ago, and they’re still remarkably the same. When it comes to computer operating systems, Unix is, more or less, the survivor. Android, iOS, MacOS and Linux are all decedents of Unix. The latest versions of Windows even offer Unix based subsystems.
When I started with computers, most every hardware manufacturer had their own unique operating system, and larger companies offered several. Now, we’re down to just two in widespread use; Unix and Windows. Your phone, your TV, your radio, your home security system, your cloud services, your Wifi toaster, are all likely running some ancestor of Unix. As Unix co-founder Dennis Ritchie said in The Unix-Haters Handbook: “The [competing] systems you remember so fondly … are not just out to pasture, they are fertilizing it from below”.
For all of Unix’s cryptic inscrutability, it’s not going away. Best learn to live with it.


